Using the SDK in Wix
Integrating illow's widget in Wix is as simple as using any other site builder platform. However, interacting with the SDK might be challenging, since Wix's development environment called Velo is sandboxed. Which means that the Website SDK methods and events are out of reach. Having said that, there is a workaround using plain vanilla Javascript's Custom Elements.
Within Custom Elements, you can place unsandboxed javascript code, which can communicate with the Website SDK, but can not call Velo functions or libraries (such as the authentication module). So the idea is to build a communication channel between Velo and illow by using the masterPage.js file and the Custom Element defined.

In the following example we are going to integrate the Velo's Authentication module with illow's identity feature. Follow these steps to achieve the integration.
1. Create a Custom Element
Open the page editor, click on the + icon and look for Embeded Code. Then select Popular Embeds and then click on Custom element.
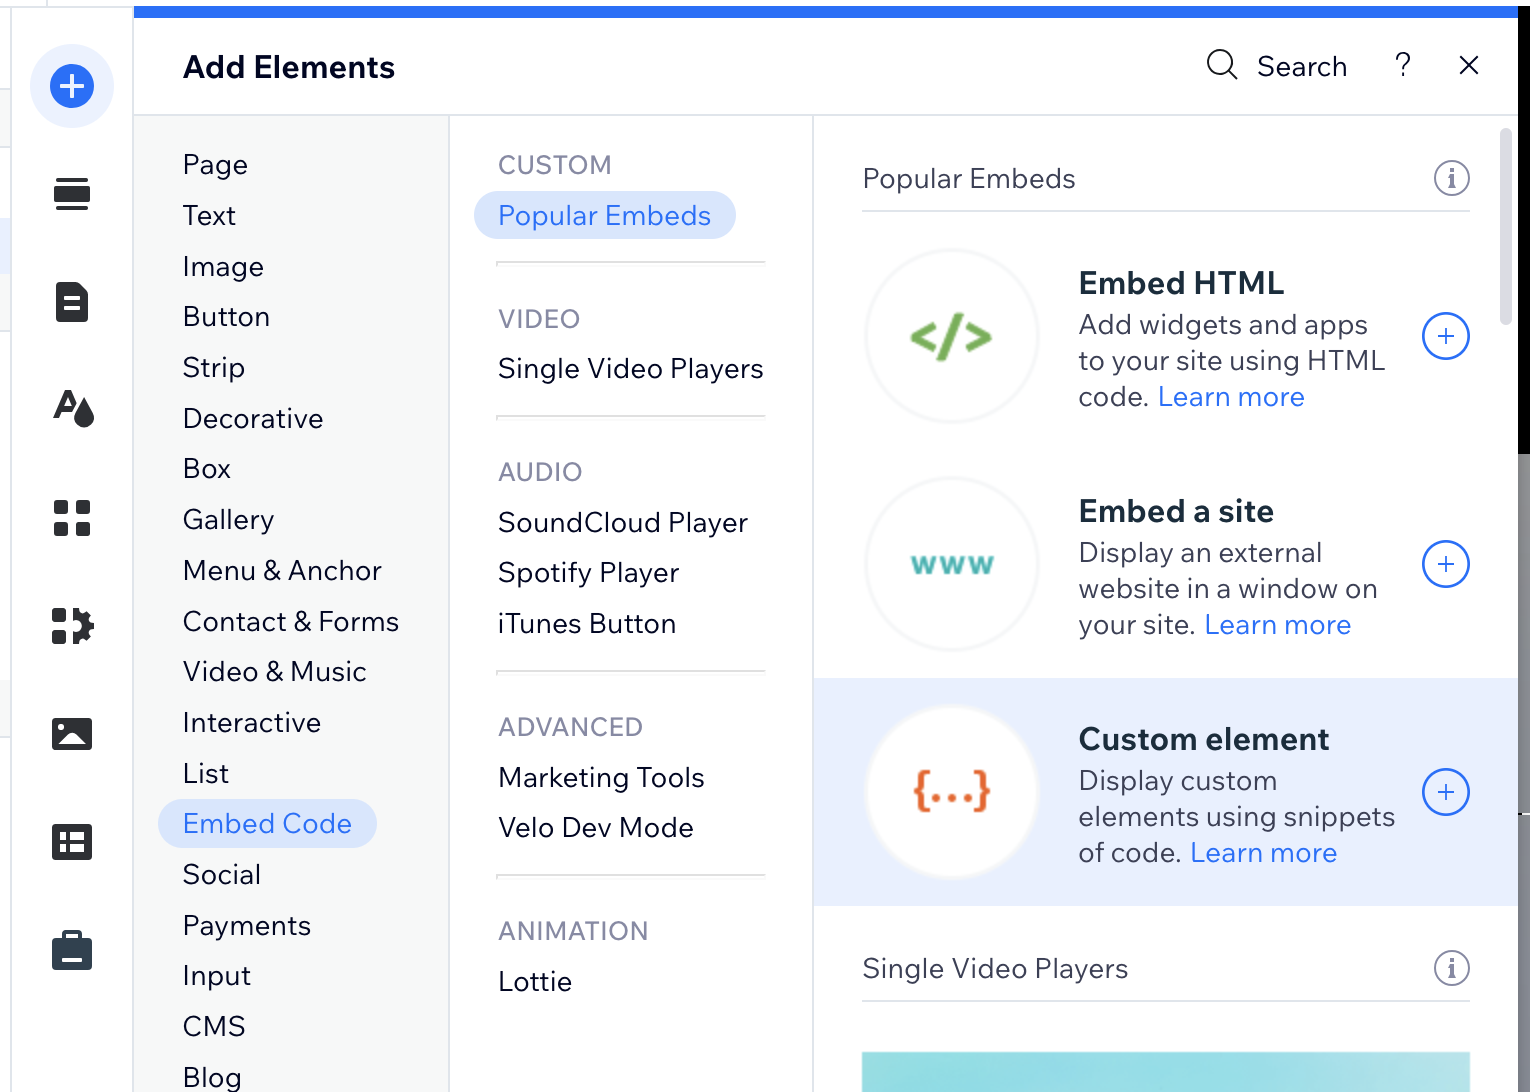
This Custom Element will be invisible to the user, so make sure to place it in a section that will be rendered in all your Wix pages (like a navigation bar).
2. Configure the Custom Element
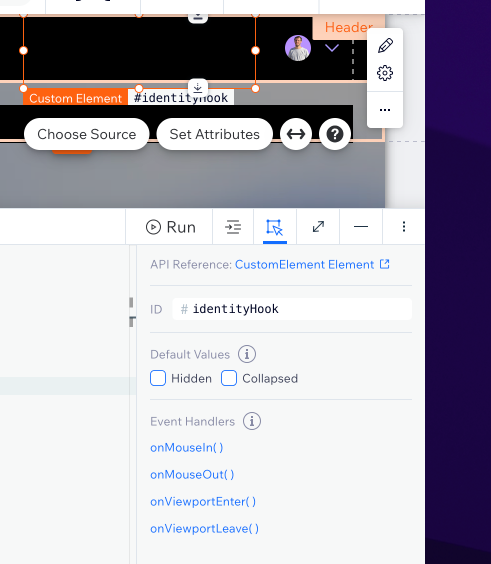
Once the element is created you'll have to configure its DOM ID, its name and its source code.
To define its DOM ID, click on the Custom Element and change the ID field on the bottom-right part of the screen. Set the value to identityHook.
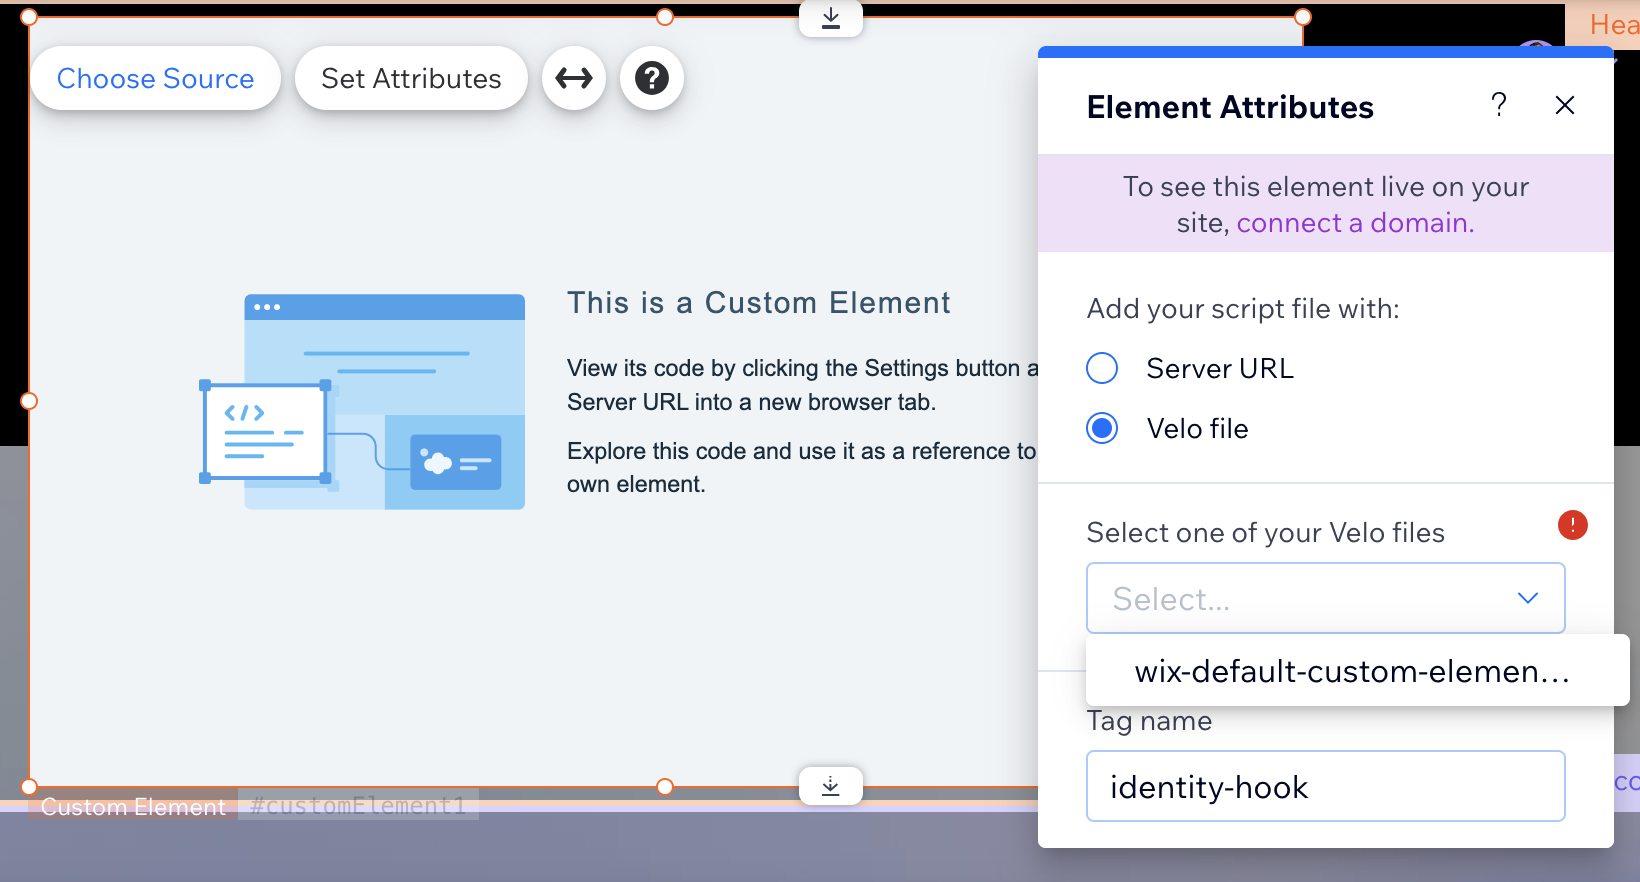
To define its name and source code, select the Custom Element and then click on Choose Source. Within the dialog opened, pick Velo file as the script source, set the Tag name to identity-hook and select to create a new file in Velo (or create it manually and use it here).
3. Define the source code in the Custom Element
Once the configuration is done, place the following code in the Velo file used in the Custom Element (if you created the file when configuring the Custom Element, it should be named something like wix-default-custom-element.js):
class IdentityHookComponent extends HTMLElement {
  static observedAttributes = ["identity"];

  callIllow(cb) {
    if (window.illow) return cb();
    window.addEventListener('illow:widget_ready', () => cb());
  }

  attributeChangedCallback(name, oldValue, newValue) {
    if (name === 'identity') {
      if (!!newValue && newValue !== oldValue) {
        this.callIllow(() => window.illow.identify(newValue));
      } else if (!newValue && !!oldValue) {
        this.callIllow(() => window.illow.removeIdentity());
      }
    }
  }
}

customElements.define('identity-hook', IdentityHookComponent);
This will call illow's identify and removeIdentity whenever the identity attribute is changed.
4. Define the source code in masterPage.js
Now what we need to do is set the identity attribute in our new Custom Element whenever the page loads or something changes in the Authentication module within Velo. To do that, place the following code in your masterPage.js file.
import { currentMember, authentication } from 'wix-members-frontend';
import wixWindowFrontend from 'wix-window-frontend';

const identify = async (member) => {
    const loggedMember = await member.getMember();
    if (loggedMember) {
        $w('#identityHook').setAttribute('identity', loggedMember.loginEmail);
    }
}

const removeIdentity = () => {
    $w('#identityHook').setAttribute('identity', null);
}

$w.onReady(async () => {
    if (wixWindowFrontend.rendering.env === "browser") {
        await identify(currentMember);
    }
});

authentication.onLogin(identify);
authentication.onLogout(removeIdentity);
This will set the user's email account as the User ID for the consent. If you prefer using the account's ID, then change where it says loggedMember.loginEmail for loggedMember._id_.
5. Publish changes
Once these two configurations are done, publish the changes and off you go! Take into account that this guide assumes that you have already integrated the widget source tag. If you haven't done so, please follow these steps to do so.